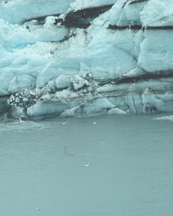
 Dust is a common cause of problems in digital imaging. It finds its way onto sensors, particularly in digital SLRs where lenses are removed, and also on to the surface of film in traditional cameras. When slides or negatives are scanned, unwanted black dots appear on the image. Particles lodged on the surface of a sensor are sharply defined, and recorded in every image until removed. Those on film or in a traditional camera may cast shadows and also move around, and those detected by film scanners appear as soft black dots in the image. Removal of this contamination can be a tiresome and time-consuming process. The image of the glacier on the right was taken in Alaska, and looks reasonably clean until the magnification is increased as in the two other images below.
The best method for removing dust from an image, apart from keeping equipment clean so that the problem does not occur, is to use the "dust and scratches" filter in Photoshop CS5, or the healing brush in Photoshop. The dust and scratches filter cleans the whole image in a few seconds once appropriate settings for radius and threshold have been set. To remove dust manually in areas of even tone, choose a soft brush whose diameter is at least two or three times that of the dust spots in the image and take a reference sample from a neighbouring location of similar hue and brightness. This is done by holding down the Alt (or Option) key while mouse-clicking on the image. Then place the brush over the dust spot with the offending particle at the centre of the brush area, and click the mouse. In areas containing a lot of detail, use a harder edged brush and try to align the cloned sample with the pixels of the overwritten area. The problem with this method is that it may be necessary to scan the whole image at high magnification, following a carefully controlled grid movement, to locate and remove all dust spots. This can take some time. Work from clean areas in to contaminated regions to avoid cloning small specks across the image.
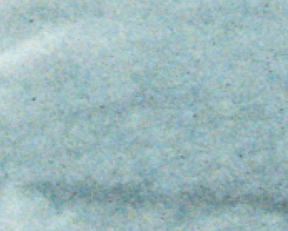 Most dust spots will be found in areas of even tone such as clear blue sky simply because they are more easily noticed. In the example shown here, the bluish white surface of the glacier ice reveals numerous dark spots when examined closely. Spots occurring in other areas of images where tones are brightness vary in an almost random fashion, such as in natural rocks, may never be noticed and hence may not matter. However, the diligence required increases with the dimensions of the final image. On 6" x 4" prints few dust spots are likely to be visible, but on an A3 or A2 print a great deal of care is required.
A potentially faster method for removing large numbers of dust specks involves the creation of a duplicate layer (Layer - Duplicate layer). The new layer is then dragged just a small distance either vertically or horizontally. The distance of the movement should be perhaps five or six times the diameter of a dust spot. A black layer mast is then applied to the duplicate layer (Layer - Layer mask - Hide all). The image should then appear to jump back to its original location. Dust spots can now be removed by painting on the black layer mask with a soft white brush of a suitable diameter. Wherever the white brush is applied, the shifted duplicate layer shows through the background, so removing the dust spots. The technique has limitations and will not work satisfactorily in some circumstances, for example close to step transitions in hue and brightness. Where this occurs just use the Undo facility or change the brush to black and reverse the process. However the method does have the advantage of speed where a large number of dust spots must be removed. When finished, flatten the layers and save the file.
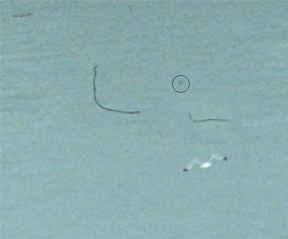 This final image, a magnified section of the water below the glacier, shows two hairs in the centre, a smaller one at top left, and one or two dust spots. The largest dust spot is circled by the healing brush chosen to remove it. The hairs can be removed progressively using the healing brush repeatedly to work along their length. Alternatively they can be removed using the shifted duplicate layer technique described above. In this case, the duplicated layer would be best moved horizontally before painting out the vertical section of the hair. The layers would then be flattened and the process repeated. This time, the duplicated layer would need to be shifted vertically to paint out the horizontal section of the hair.
Some film scanners incorporate dust-removal software which replaces isolated dark specks with pixels similar to those in the surrounding areas of an image. This may work well in some cases but the results need to be check manually. Other detail may be unduly disturbed and film grain may be interrupted in a discernable fashion. In other cases small gaps may be left where the dust-removal process has not worked perfectly. The dust and scratch removal filters provided by some image manipulation software tend to destroy fine detail in an image as well as the unwanted specks, and cannot generally be used on complete images. They may produce better results in limited areas defined by masking or selection, but the removal of fine detail may still be noticeable.