Noise in a digital image tends to worsen as light levels fall, ISO speeds increase, and the number of photons striking each cell of a sensor reduces. In some images, noise can be used creatively, but in most cases photographers prefer to minimize or effectively eliminate the phenomenon. In broad terms, noise can be divided in to two categories - colour noise and luminance noise. Colour noise can be seen clearly in the image on the right. It tends to be most noticeable in homogeneous areas of an image. However, there are a number of techniques which can be used to reduce the effect. One of these is described below.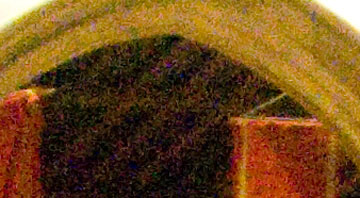
The first stage is to convert the image from RGB colour in to Lab colour (found in the Mode menu in Photoshop).This produces three channels named "Lightness", "a" and "b". The lightness channel, as one might expect, contains the lightness information for the image. Noise found in this channel is known as luminance noise. The other two channels, "a" and "b", contain the colour information for the image, and it is in these that colour noise is found. Begin by selecting channel "a" and assessing the extent of colour noise. Then select Blur/Smart Blur from the filter menu in Photoshop. This filter is particularly useful because it detects edges in an image and blurs them to a lesser extent that other areas. Sharpness is consequently preserver to a large extent although colours are slightly blurred. The consequences of blurring colour depend to a large extent upon the nature of a particular image, so setting must be adjusted accordingly. Images with a lot of fine colour detail are degraded more rapidly than those featuring less colour detail. Overall image sharpness is determined mostly by the information in the lightness channel, so should not be degraded by colour noise reduction procedures. Colours may become somewhat duller as a result of noise reduction, but this effect can sometimes be offset to some extent by a judicious increase in saturation in the affected areas.
The same basic procedure can be applied to the "b" channel although the settings used may need to be changed. Examine the noise problem in the channel carefully and explore the effects of various setting until optimum values are revealed. The mode control should remain set to "Normal" and the quality control should be set to "High". The radius and threshold settings should be varied according to need.
When satisfied with the improvement achieved, change the image back to RGB colour from within the Mode menu. The reduction of luminance noise is addressed in another article.