All photography is of course about the quality of light but in the case of still-life work, where every aspect of the lighting is also under the control of the photographer, it is the single most important technical factor in creating an excellent image. However good lighting, which can be used to achieve context, interest and mood, does not have to be difficult to achieve.
Still-life set-ups may be illuminated using flash or continuous light sources (such as tungsten bulbs, LEDs, daylight etc). Flash has the inherent disadvantage that the light falling on the subject at the time of the exposure cannot easily be seen by the photographer. Of course it is possible to provide various types of preview illumination, but the actual flash illumination still remains transient and hence elusive. Nevertheless, with proper control, flash lighting can be used to produce wonderful still-life images.
 |
| Public domain image |
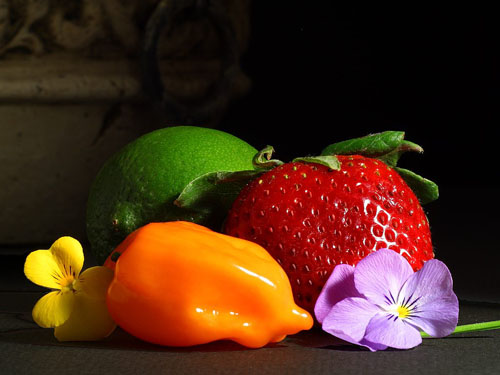
In general, lighting for still-life should produce relatively high contrast to create shadows and depth, and to reveal texture. In the case of strobe or continuous lighting this means setting individual lights to give different levels of illumination. This can be done, where possible, by adjusting source output levels, or by changing the source-to-subject distance. The main light should, in most cases, be set to provide the appropriate level of illumination for the scene. A second light, typically set to provide a significantly lower level of illumination, should be used as fill and hence control the depth of shadows.
The focal length of a lens used to capture still-life images, typically in the range 50mm to 135mm for 35mm or DSLR camera formats, also has a bearing upon the lighting setup. Remember that as light sources are moved further from a subject they tens towards harder point sources. Move them closer and the source is comparatively larger and hence softer. A lens having a focal length less than about 50mm is likely to start introducing curved lines into the image, and a lens longer than about 135mm may have to be moved too far back from a subject to be practicable.
The second major aspect of a lighting set-up is the direction of the light sources relative to the camera, subject and other lights. Side lighting is always effective in producing depth, shadows and contrast, and enhancing textural detail. The objective should be to bring the subject to life and, despite its inanimate nature, give it dynamism. A viewer should not only want to explore image, seeking out the centre of interest as the eye flows over the lines and forms within it, but also reach out and tough the textured surfaces and various forms.
When setting up lighting for a still-life shot it is also important to consider the quality of the light sources. Not least among the variables is the extent to which sources are diffused. Diffusion is relatively easily and cheaply achieved by using custom diffusers or soft-boxes on each light source, or directing sources through simple diffusing materials such as sheets of bubble or translucent plastic. Suitable materials can be found in local hardware stores. A diffused source produces more even lighting and contrast is generally reduced. Highlights are toned down and shadows become less dark. Experimentation is the only way to achieve the required results.
A further directional aspect of lighting set-ups is the position of the camera relative to the subject. Don't just settle for a convenient camera angle giving a straightforward "normal" view of the subject. Experiment with a variety of angles and approaches and don't be afraid to try something quite different. Whatever angle is used must of course "work" photographically, but new ways of looking at familiar subjects often give different perceptive and renewed interest.